Happy New Year!
In this issue I will guide the reader through the process of creating a Program Application Form. Here are the steps I will cover:
- Create a Form
- Add Fields
- Add SPAM Protection
- Directions
- Error Messages
There are a number of form builders for your website. Generally there are two types of form builders:
- A Service: Services are online apps you pay for that allow you to create forms and either link to them from your website, or embed them into pages on your website.
- On-Site Apps or Plugins: On-site form builder apps or plugins add form builder features to your website.
We prefer and recommend using on-site form builder apps or plugins for these reasons:
- Users stay on your website.
- You own and control your form submissions data.
- You have more options for customizing your forms.
I will use the
Forminator Pro WordPress plugin for this guide. Let’s get started.
The first thing to consider about a form you want to create is will it be a single form, or a multi-step form?
I use this rule: if the form contains more than twenty (24) fields, then consider making it a multi-step form.
I recommend organizing form steps (pages) by types of data being collected. Here are some example form step titles: Parent Information; Child Information; Emergency Contacts; Parental Consent; etc.
Next, add fields to your form.
Make it super-easy for users to fill out your forms. Setup field input restrictions that normalize the data that a field collects. For example, use an Email field to collect email addresses. This will require users to enter a valid email address.
Another example is to use either a Phone field or Max Character Limit and Placeholder text to collect phone numbers. For example, to collect phone numbers in this format ###-###-#### use a Text Field, enter “Phone” for the field label, set the Max Character Limit to 12 characters, and enter “Format: ###-###-####” for the field Placeholder text.
In the previous Issue #006 you created a “Form Fields List” that lists all the fields that will appear on your form. Be sure this list includes fields required for compliance that you listed in a “Compliance Data List.”
Some things to pay attention to when creating form fields:
- Take care to select the intended Field Type.
- Edit field settings to make “Required” fields.
- Edit field settings to set Max Character Limits for fields. (I specify a Max Word Limit for Text Area fields.)
Protecting website forms from SPAM is a critical feature to add. In addition to protecting your Program Application Forms, it is important to also protect site login and registration forms.
Google’s reCAPTCHA is the most widely used website form spam prevention tool. However, there are a few issues with reCAPTCHA.
- Privacy concerns: reCAPTCHA uses tracking cookies to analyze your behavior to distinguish between real human users and spambots. This allows Google to collect user information for advertisement purposes, which is not ideal for privacy-focused users.
- Bad user experience: The image challenges in reCAPTCHA can be frustrating and difficult to solve, getting in the way of a good user experience.
- Negative conversion rate and SEO impact: reCAPTCHA can bring down your site speed, which can really harm your SEO. The extra delays it causes can also negatively impact your conversion rates.
Here are some excellent alternatives to reCAPTCHA that don’t have these issues.
- Enable the Askimet plugin and use Askimet for form SPAM protection on WordPress sites.
- Setup Honeypot and hCAPTCHA for additional form SPAM protection (included with the Forminator plugin).
Directions help make it super-easy for users to fill out your forms.

Use field Placeholder text to provide brief formatting directions or a description of what to enter into a field. For example enter “Format: ###-###-####” for a Phone field Placeholder text; or enter “name@domain.com” for an email field Placeholder text.
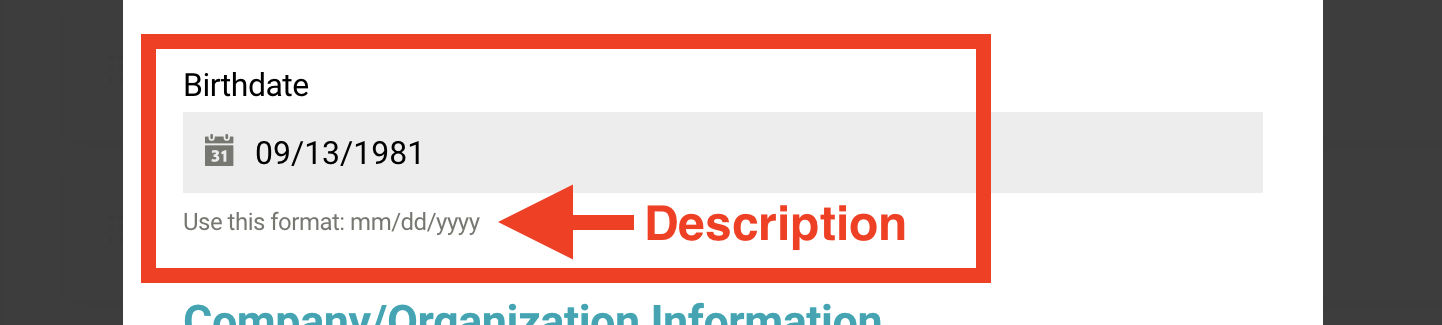
>Use a field Description to add brief directions telling the user what you want them to enter into a field. For example, enter the following description for a Date field: Use this format: mm/dd/yyyy.
Field Descriptions text appears directly below the field.
Few things are more frustrating when submitting a form online than experiencing an error and not knowing what to do to fix it. Error messages are an essential feature of web forms that eliminate the blind error experience.
Add an Error Message to each form field that is specific to that field. Here is the template I use for Field Error Messages:
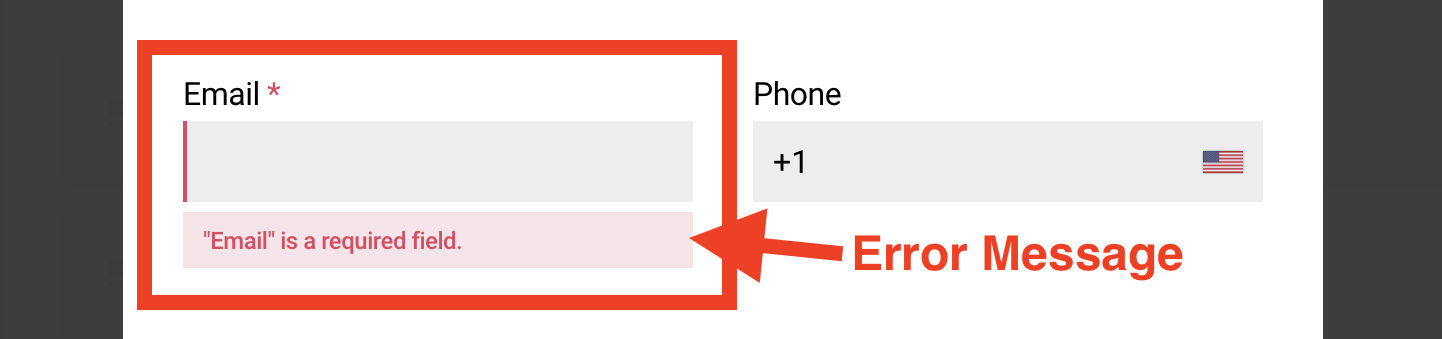
“Field Label” is a required field.
Here are some example Field Error Messages:
- “Email” is a required field. You must enter a valid email address.
- “Phone” is a required field. You must enter a telephone number. Use this format: ###-###-####
That’s it for this lesson. Your Program Application Form is now ready for the final steps. I’ll cover the final steps in the next Issue #008.
Here’s to your success!
Please take a moment to Rate The Sunday Site Tips Newsletter? Share what topic(s) you want to learn more about? What you need help with the most? The idea that powers this newsletter is to provide valuable information that’s immediately useful. I’ll use your feedback to create future newsletters. And please Forward this newsletter to a friend. Thanks in advance!
All the best,
Edward PhelpsNonprofitSites.net